How to Spend 2 Perfect Days in Zion National Park: Best Hikes, Shuttle Tips & Dining
Planning a short trip to Zion National Park? Here’s exactly how to spend 48 hours in Zion — including the best hikes, how to navigate the shuttle system, where to rent gear for The Narrows, and the top restaurants in Springdale.
🥾 Hiking:
If you’re crunched for time in Zion NP like we were, the 3 hikes below allow you to experience the best of Zion National Park in 48 hours or less
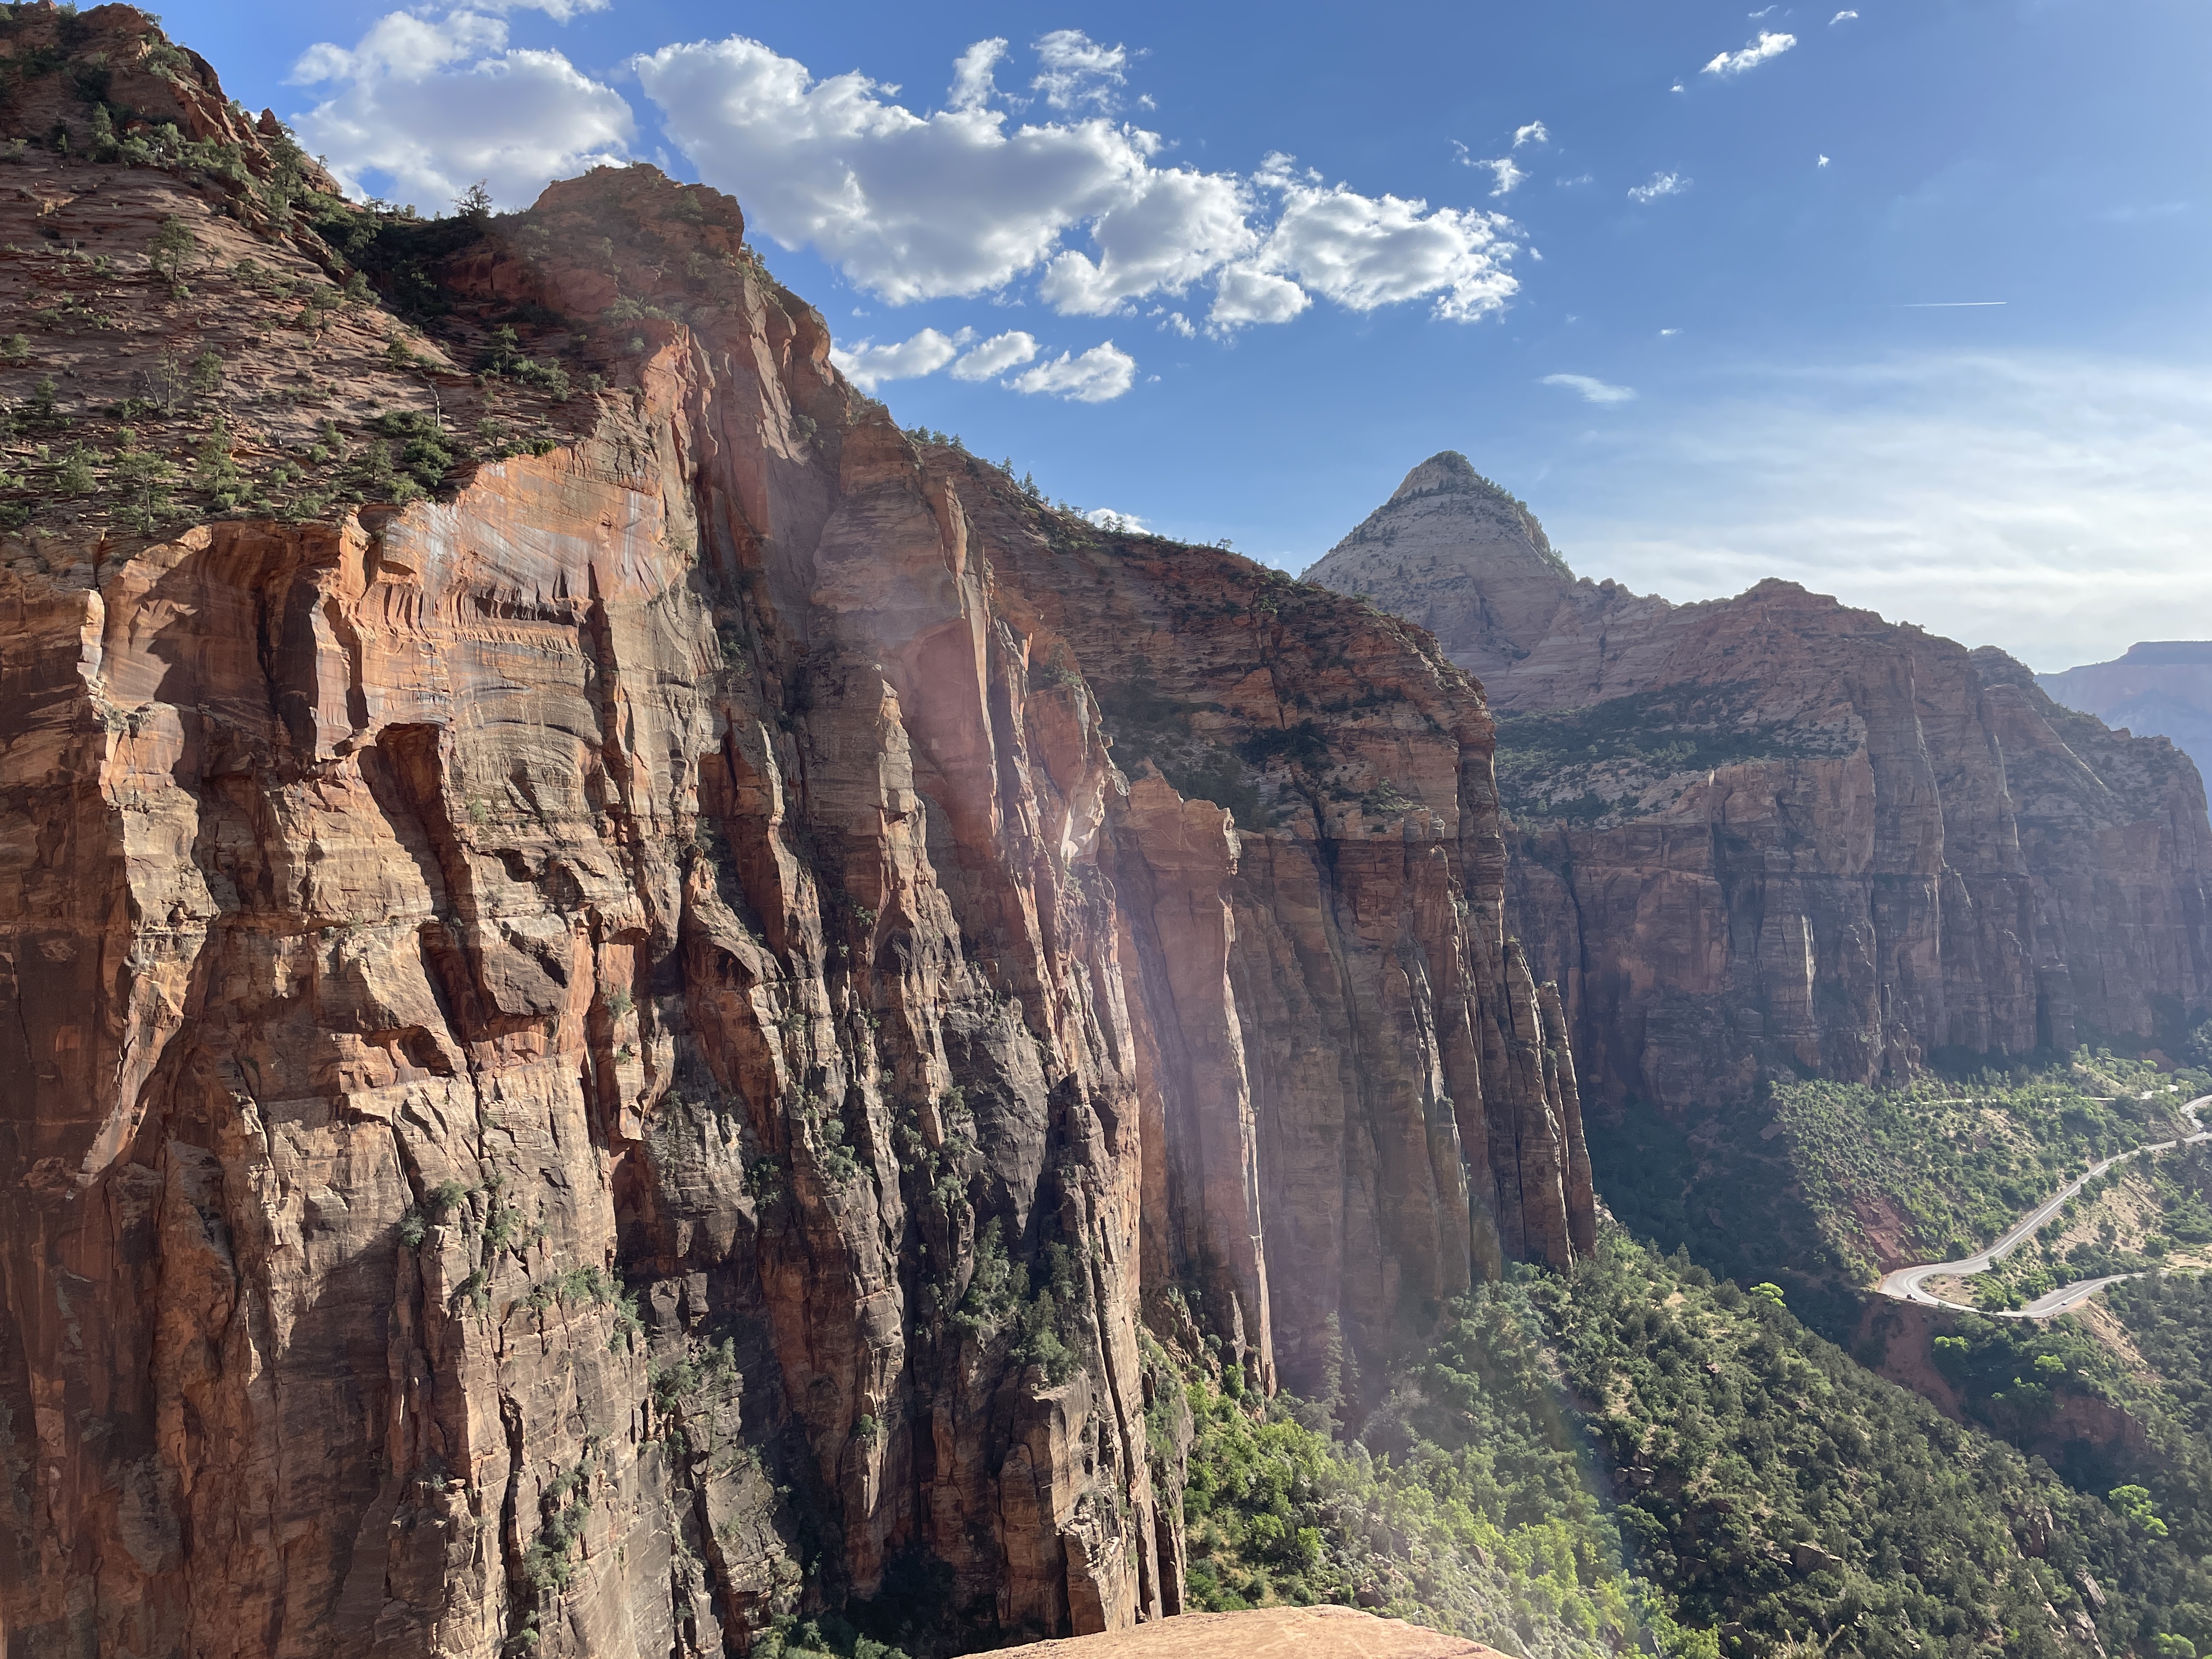
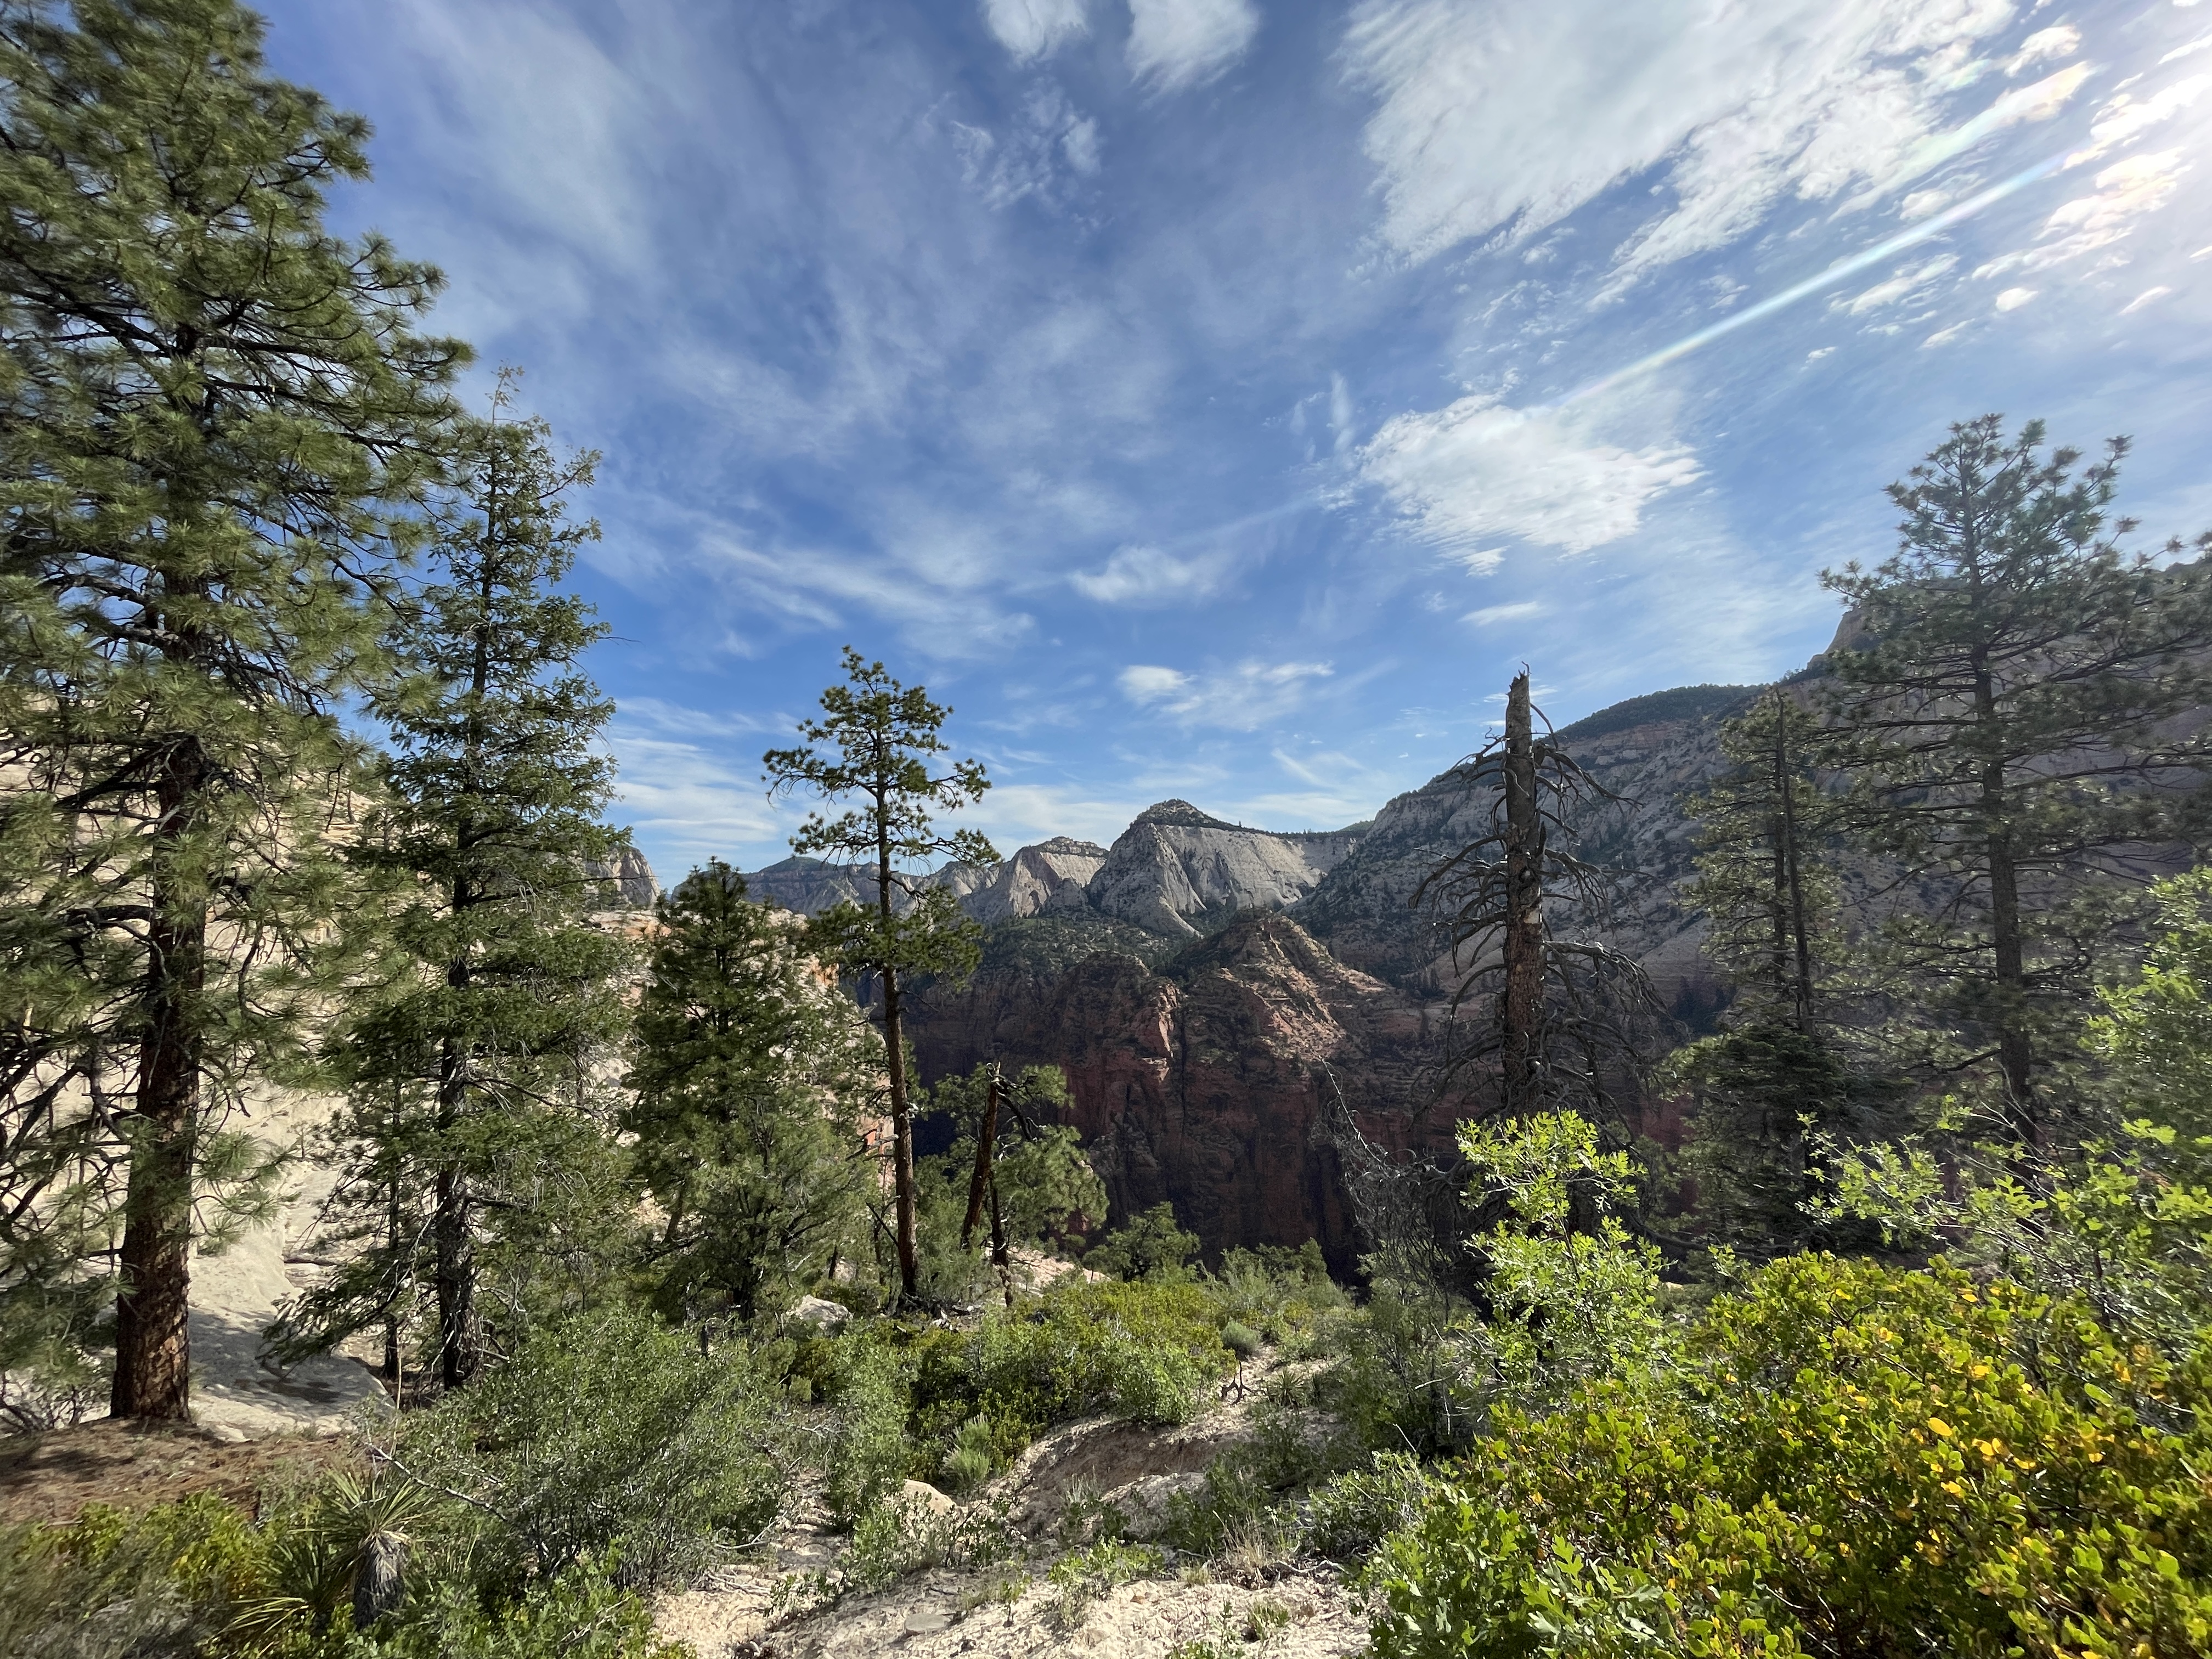
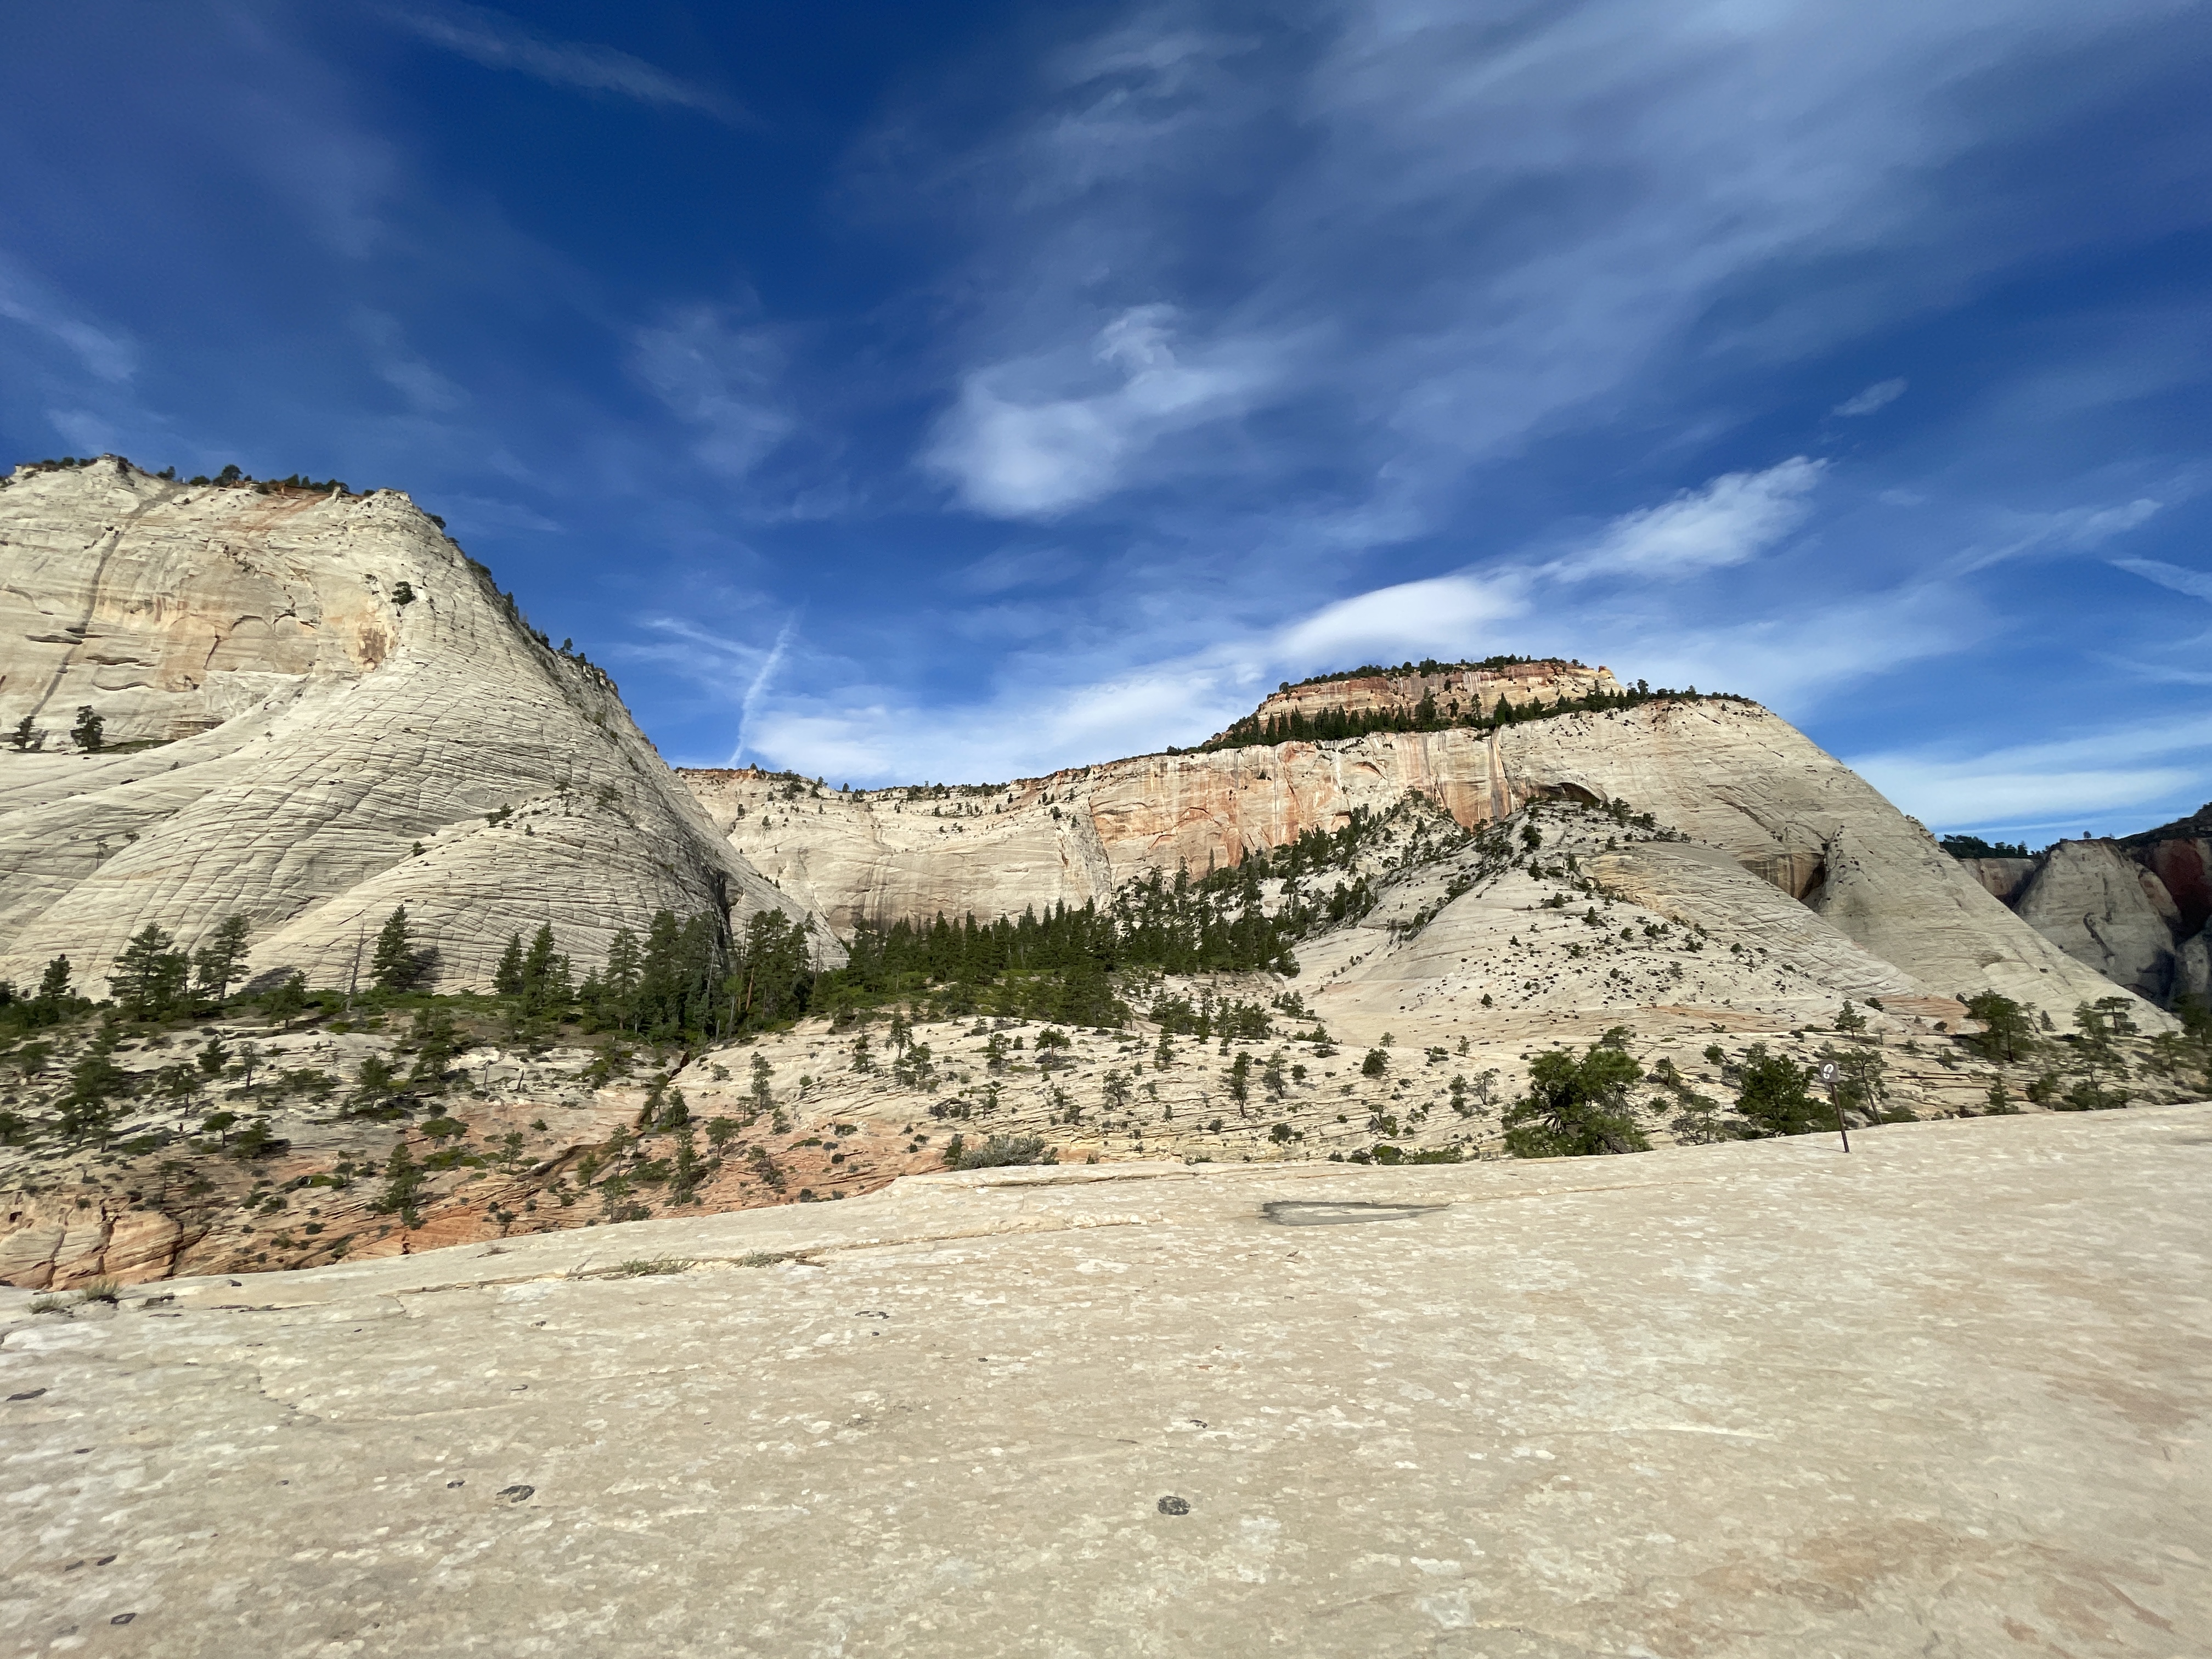
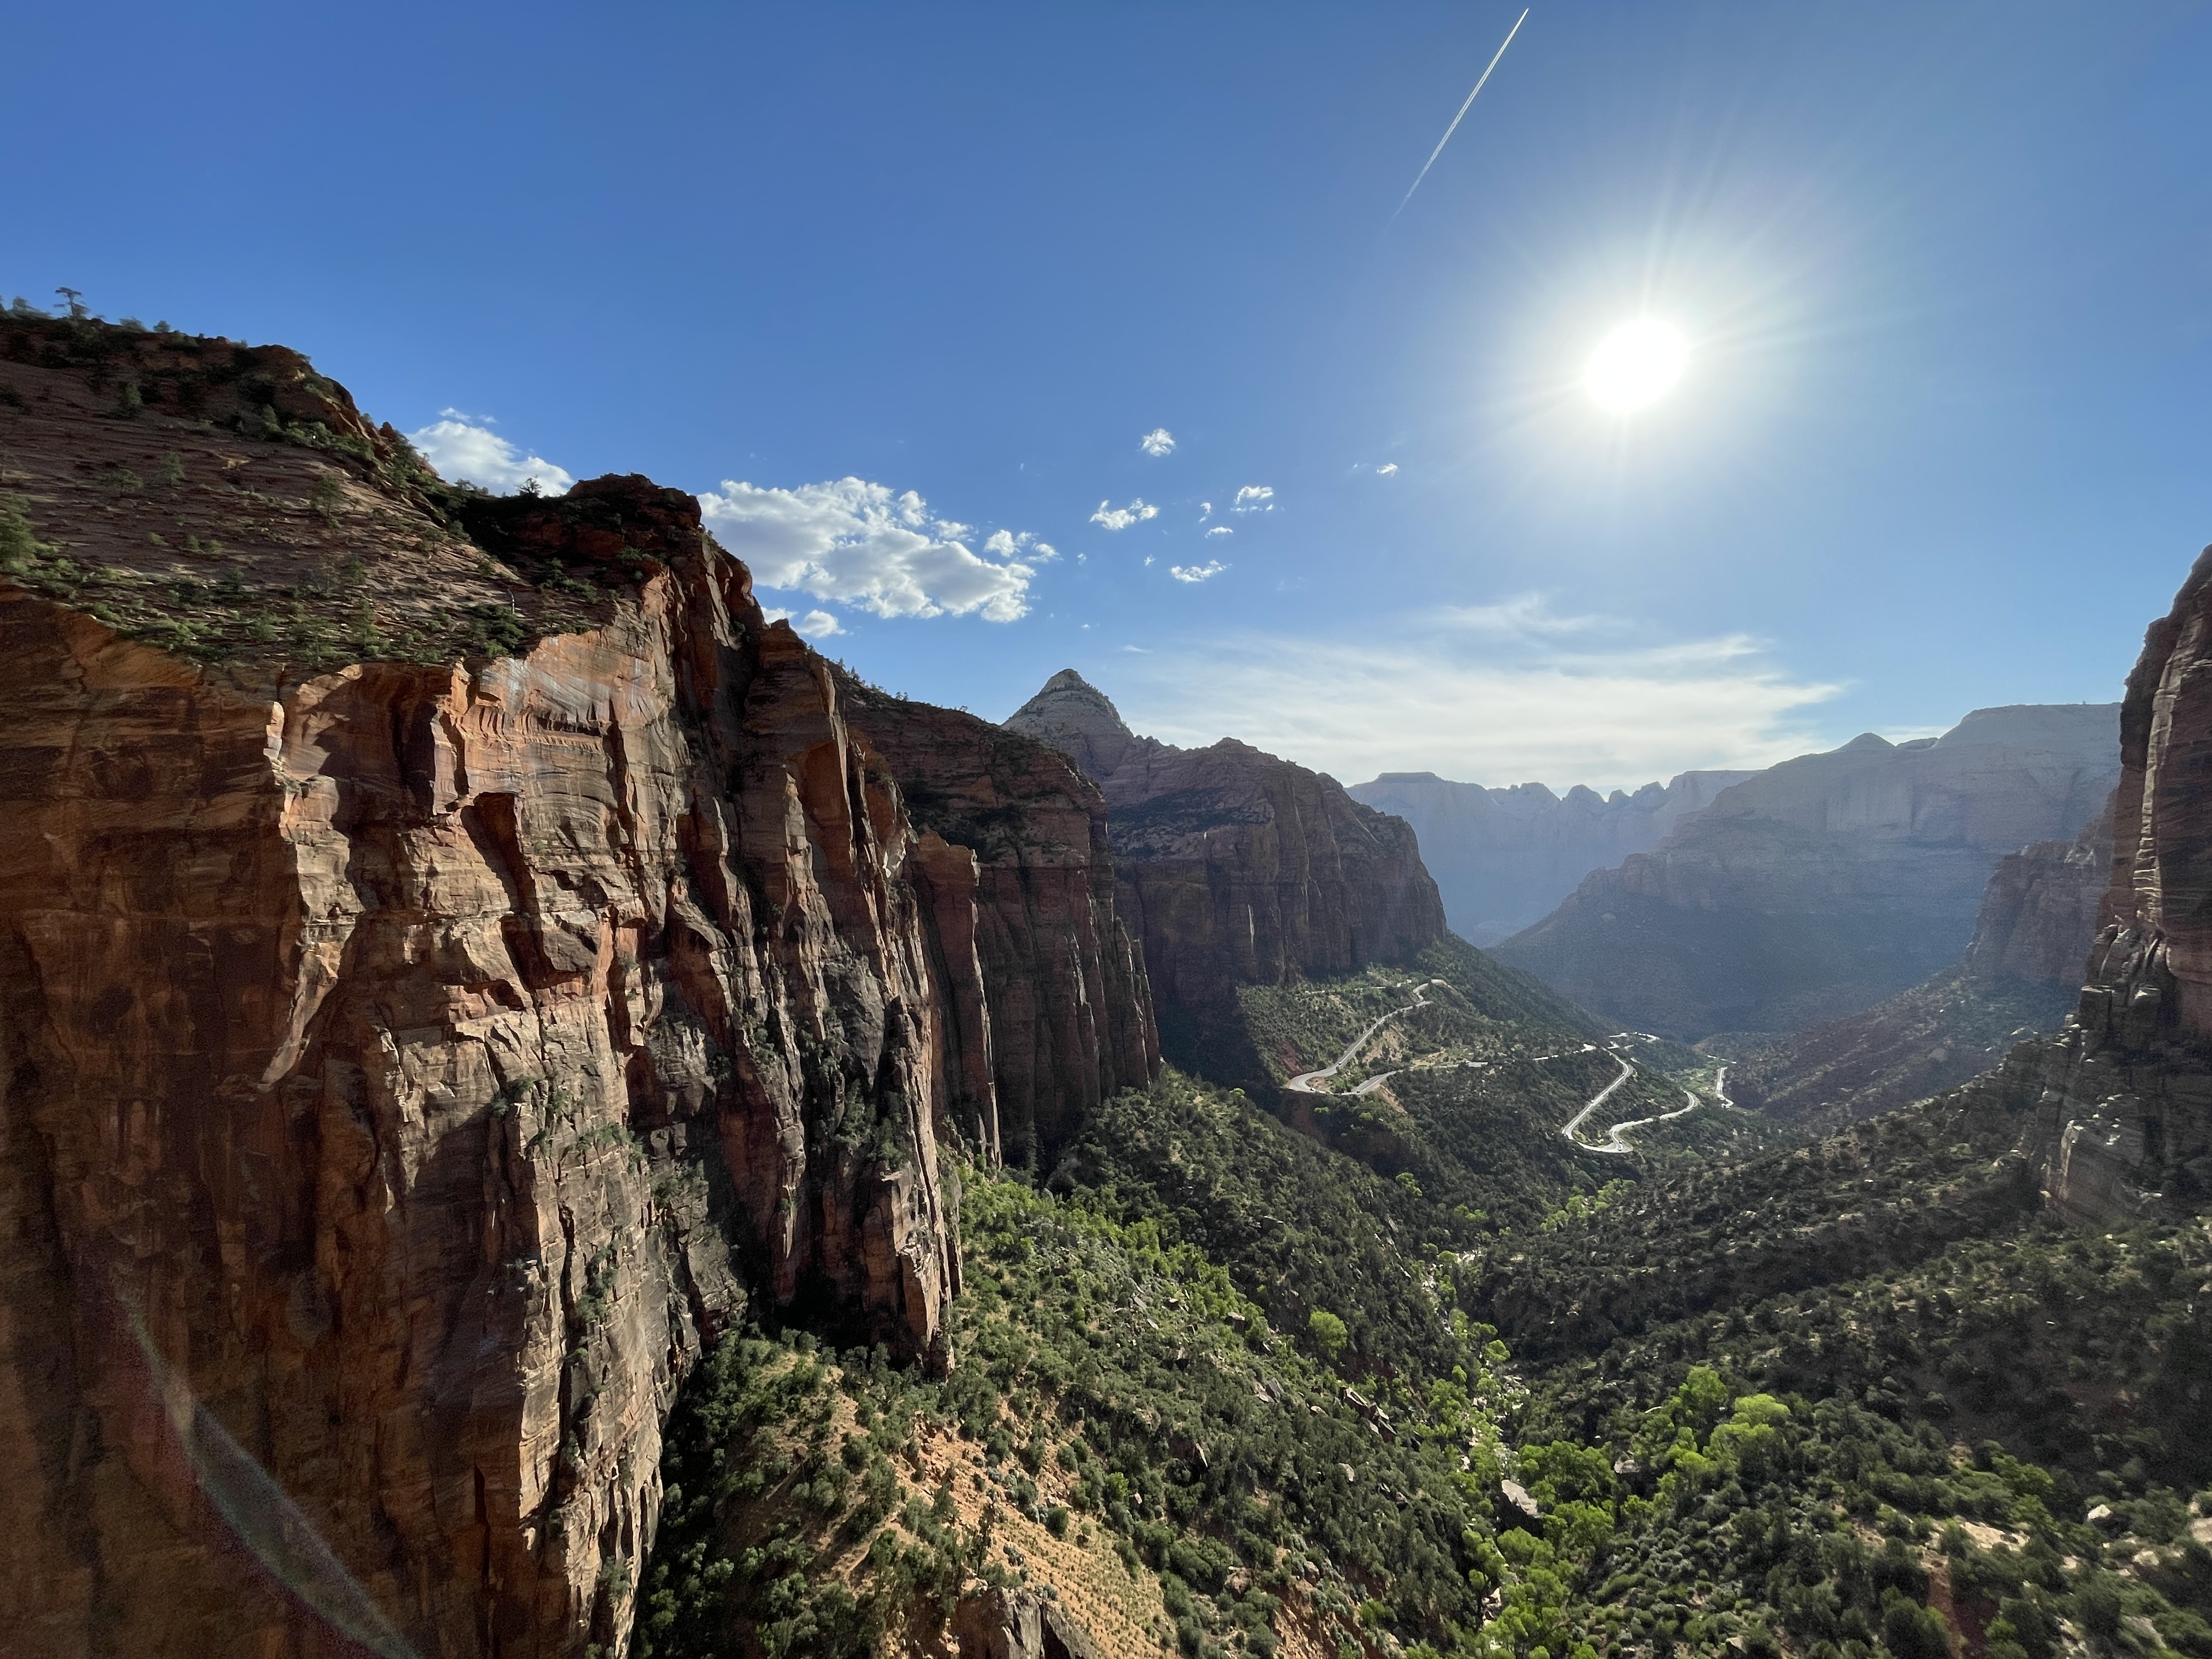
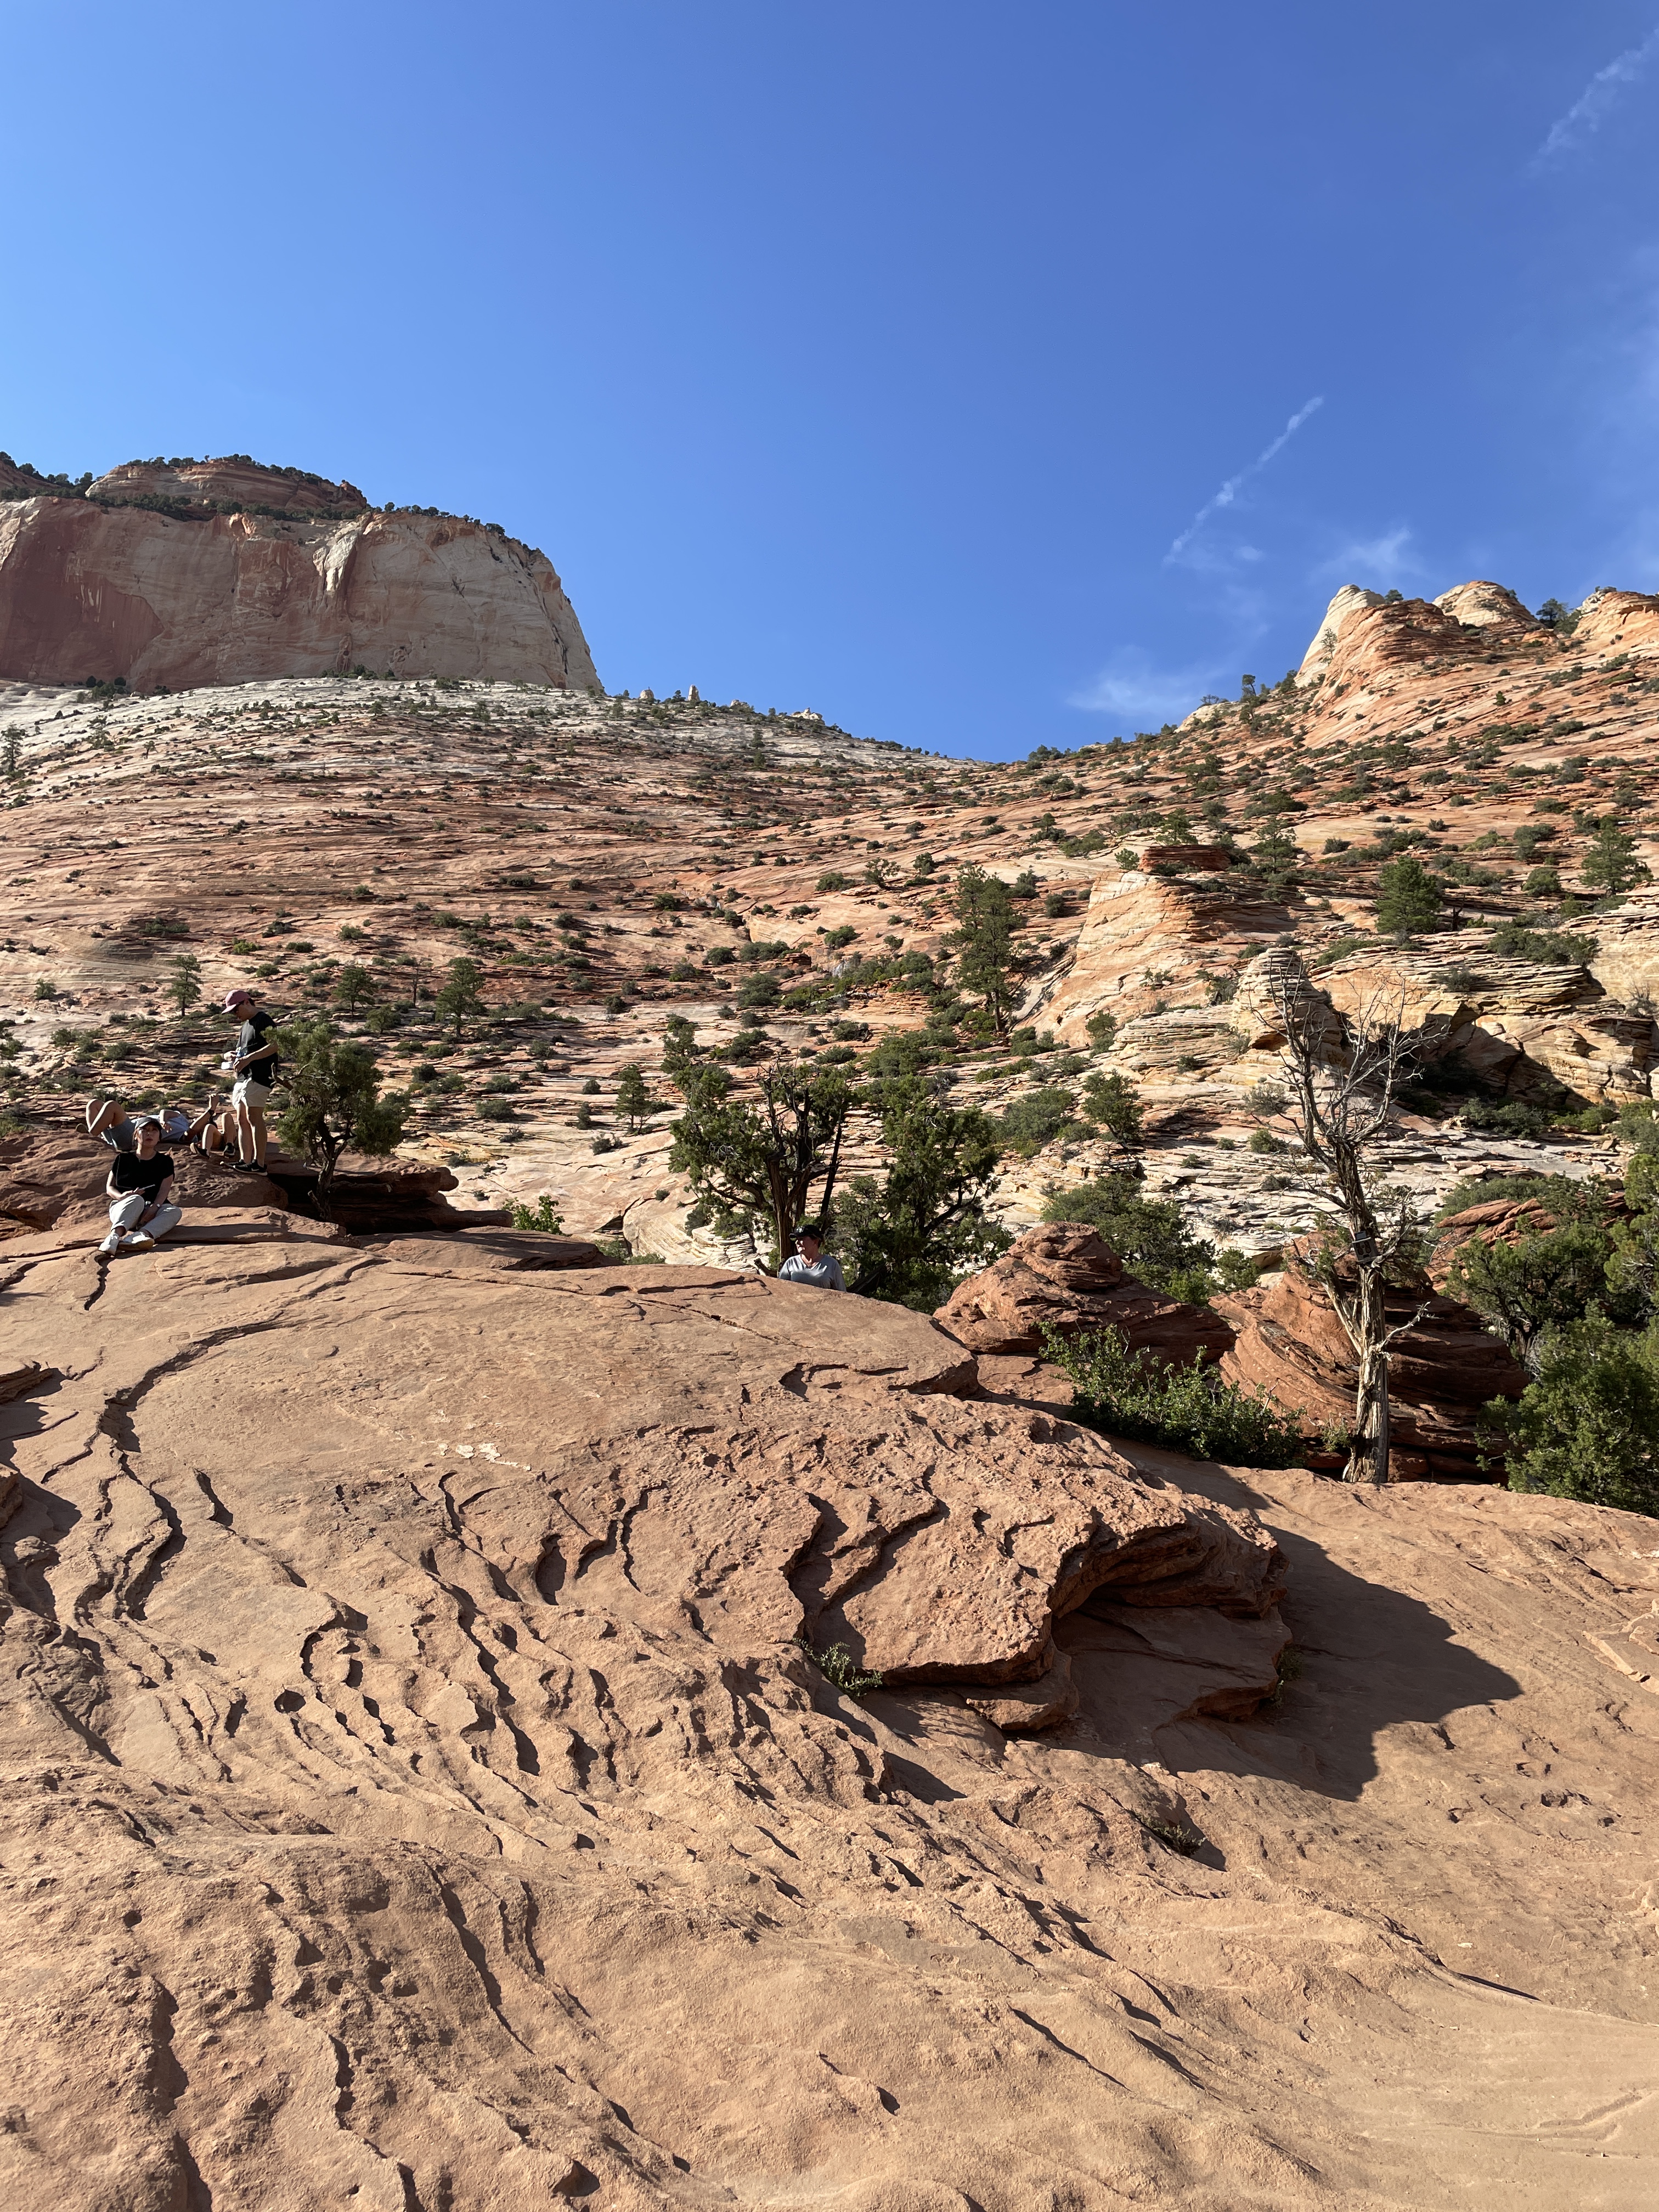
1. Scout Lookout via West Rim Trail
Distance: ~4.4 miles round-trip
Elevation Gain: ~1,100 feet
Trailhead: Grotto Shuttle Stop
This was hands down our favorite hike of the trip. The West Rim Trail perfectly captures the essence of everything Zion has to offer.
We didn’t snag a permit for Angel’s Landing, but hiking up to Scout Lookout gives you a near-identical experience. You can walk right up to the base of Angel’s Landing for panoramic views and even rest before heading up to Scout Lookout. Honestly, we didn’t feel like we missed out. We also went a few miles past Scout Lookout as the trail continues and you can turn around whenever you’d like.


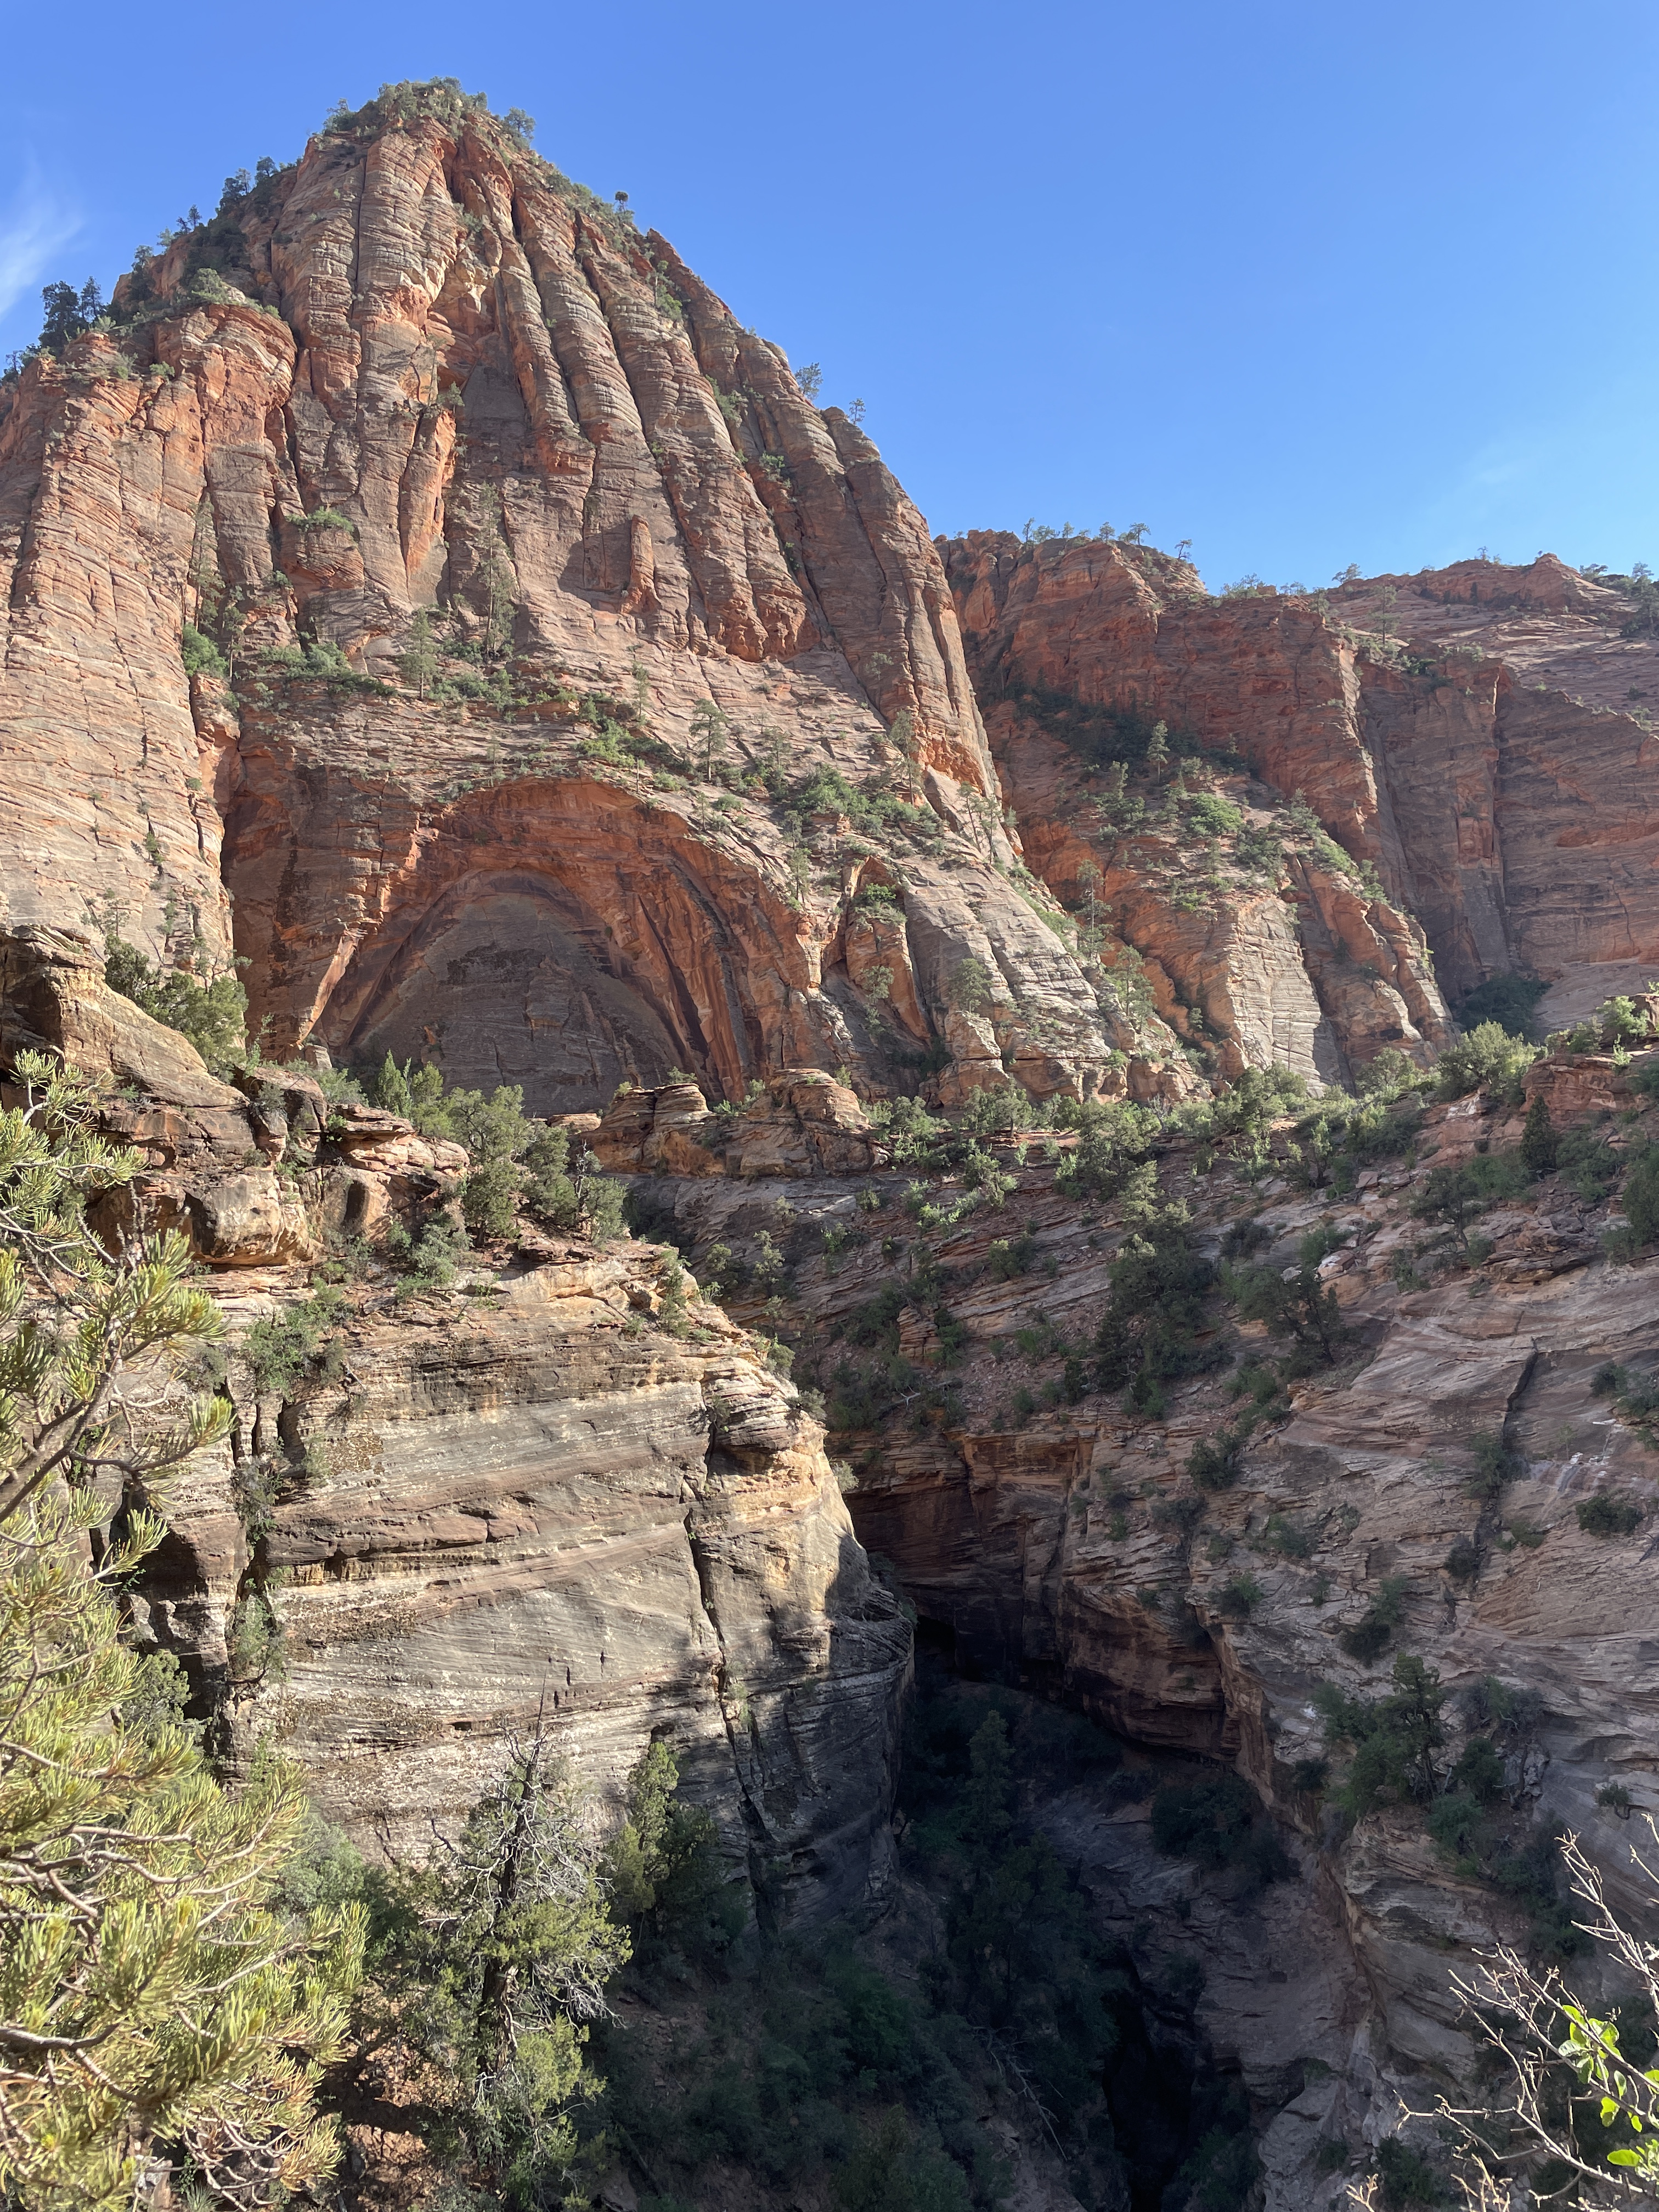
2. Canyon Overlook Trail
Distance: ~1 mile round-trip
Time: ~1 hour
Trailhead: East side of the Zion-Mount Carmel Tunnel
After the West Rim hike, we drove up to the Canyon Overlook Trail for a golden hour view — and it did not disappoint. It’s short, sweet, and delivers a huge payoff in views.
Parking can be tricky, but we lucked out around 6:30 PM. Pro tip: go later in the day to beat the heat and crowds, but budget a few extra minutes to find parking.
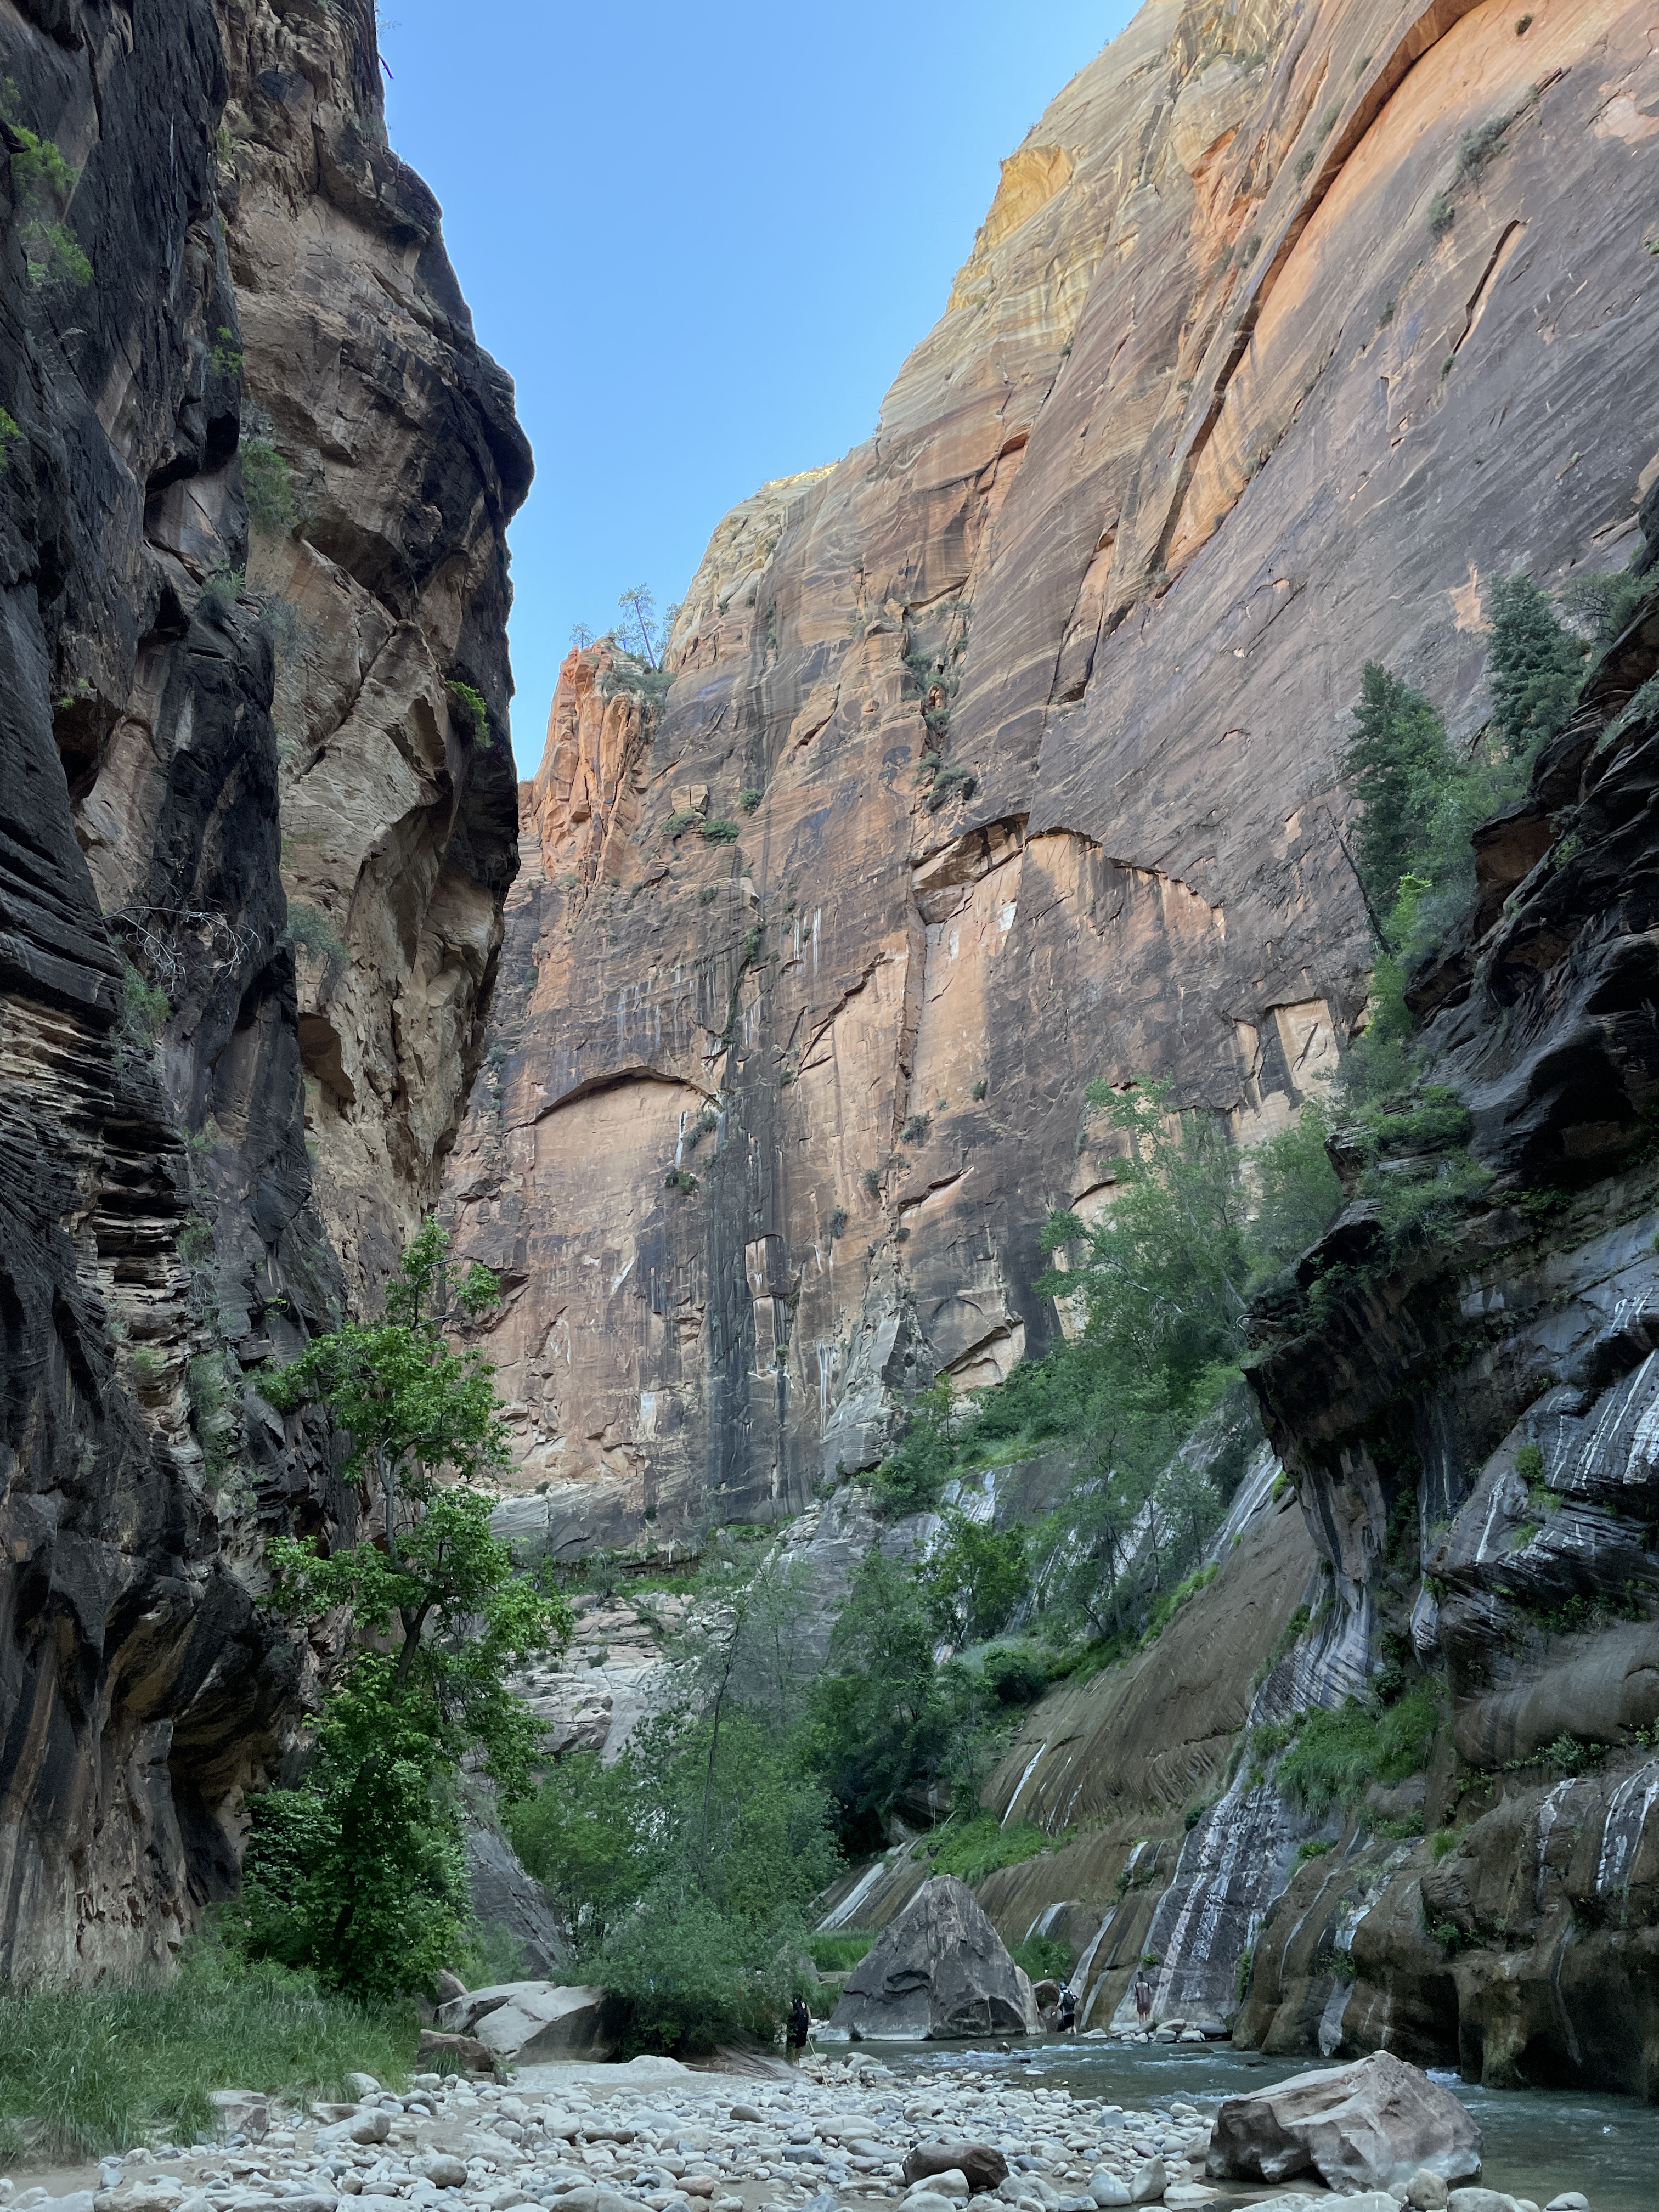
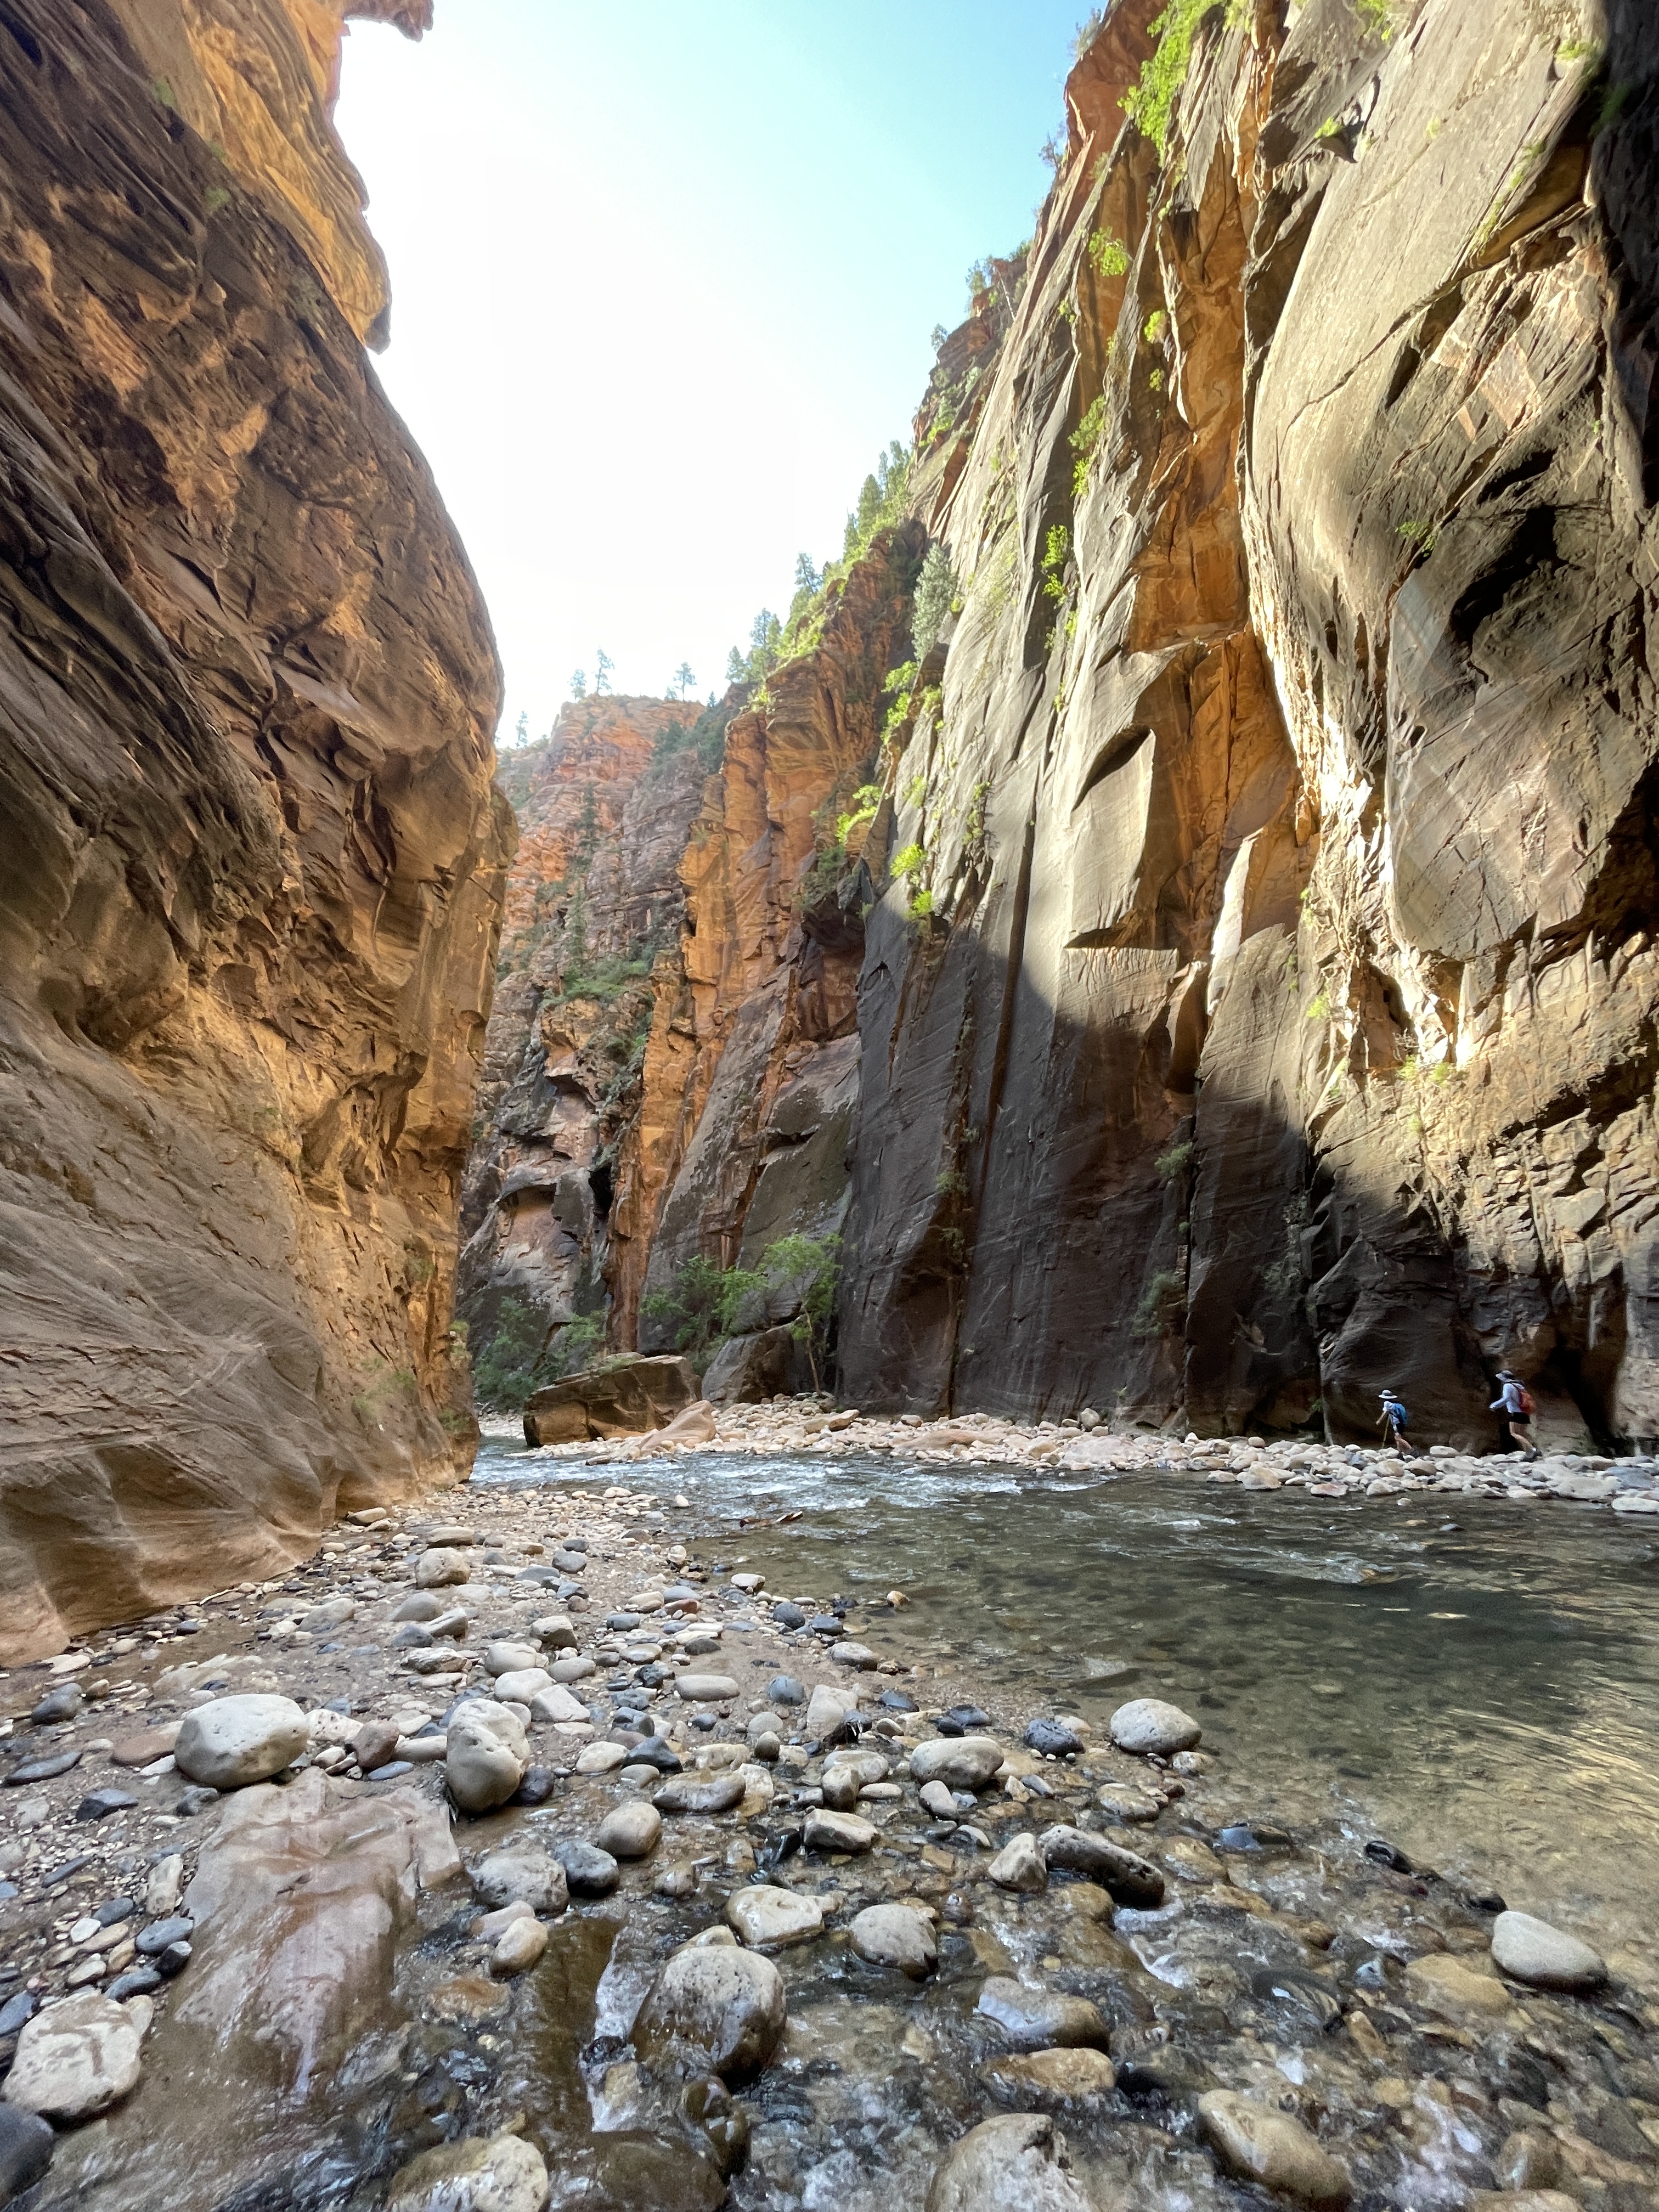
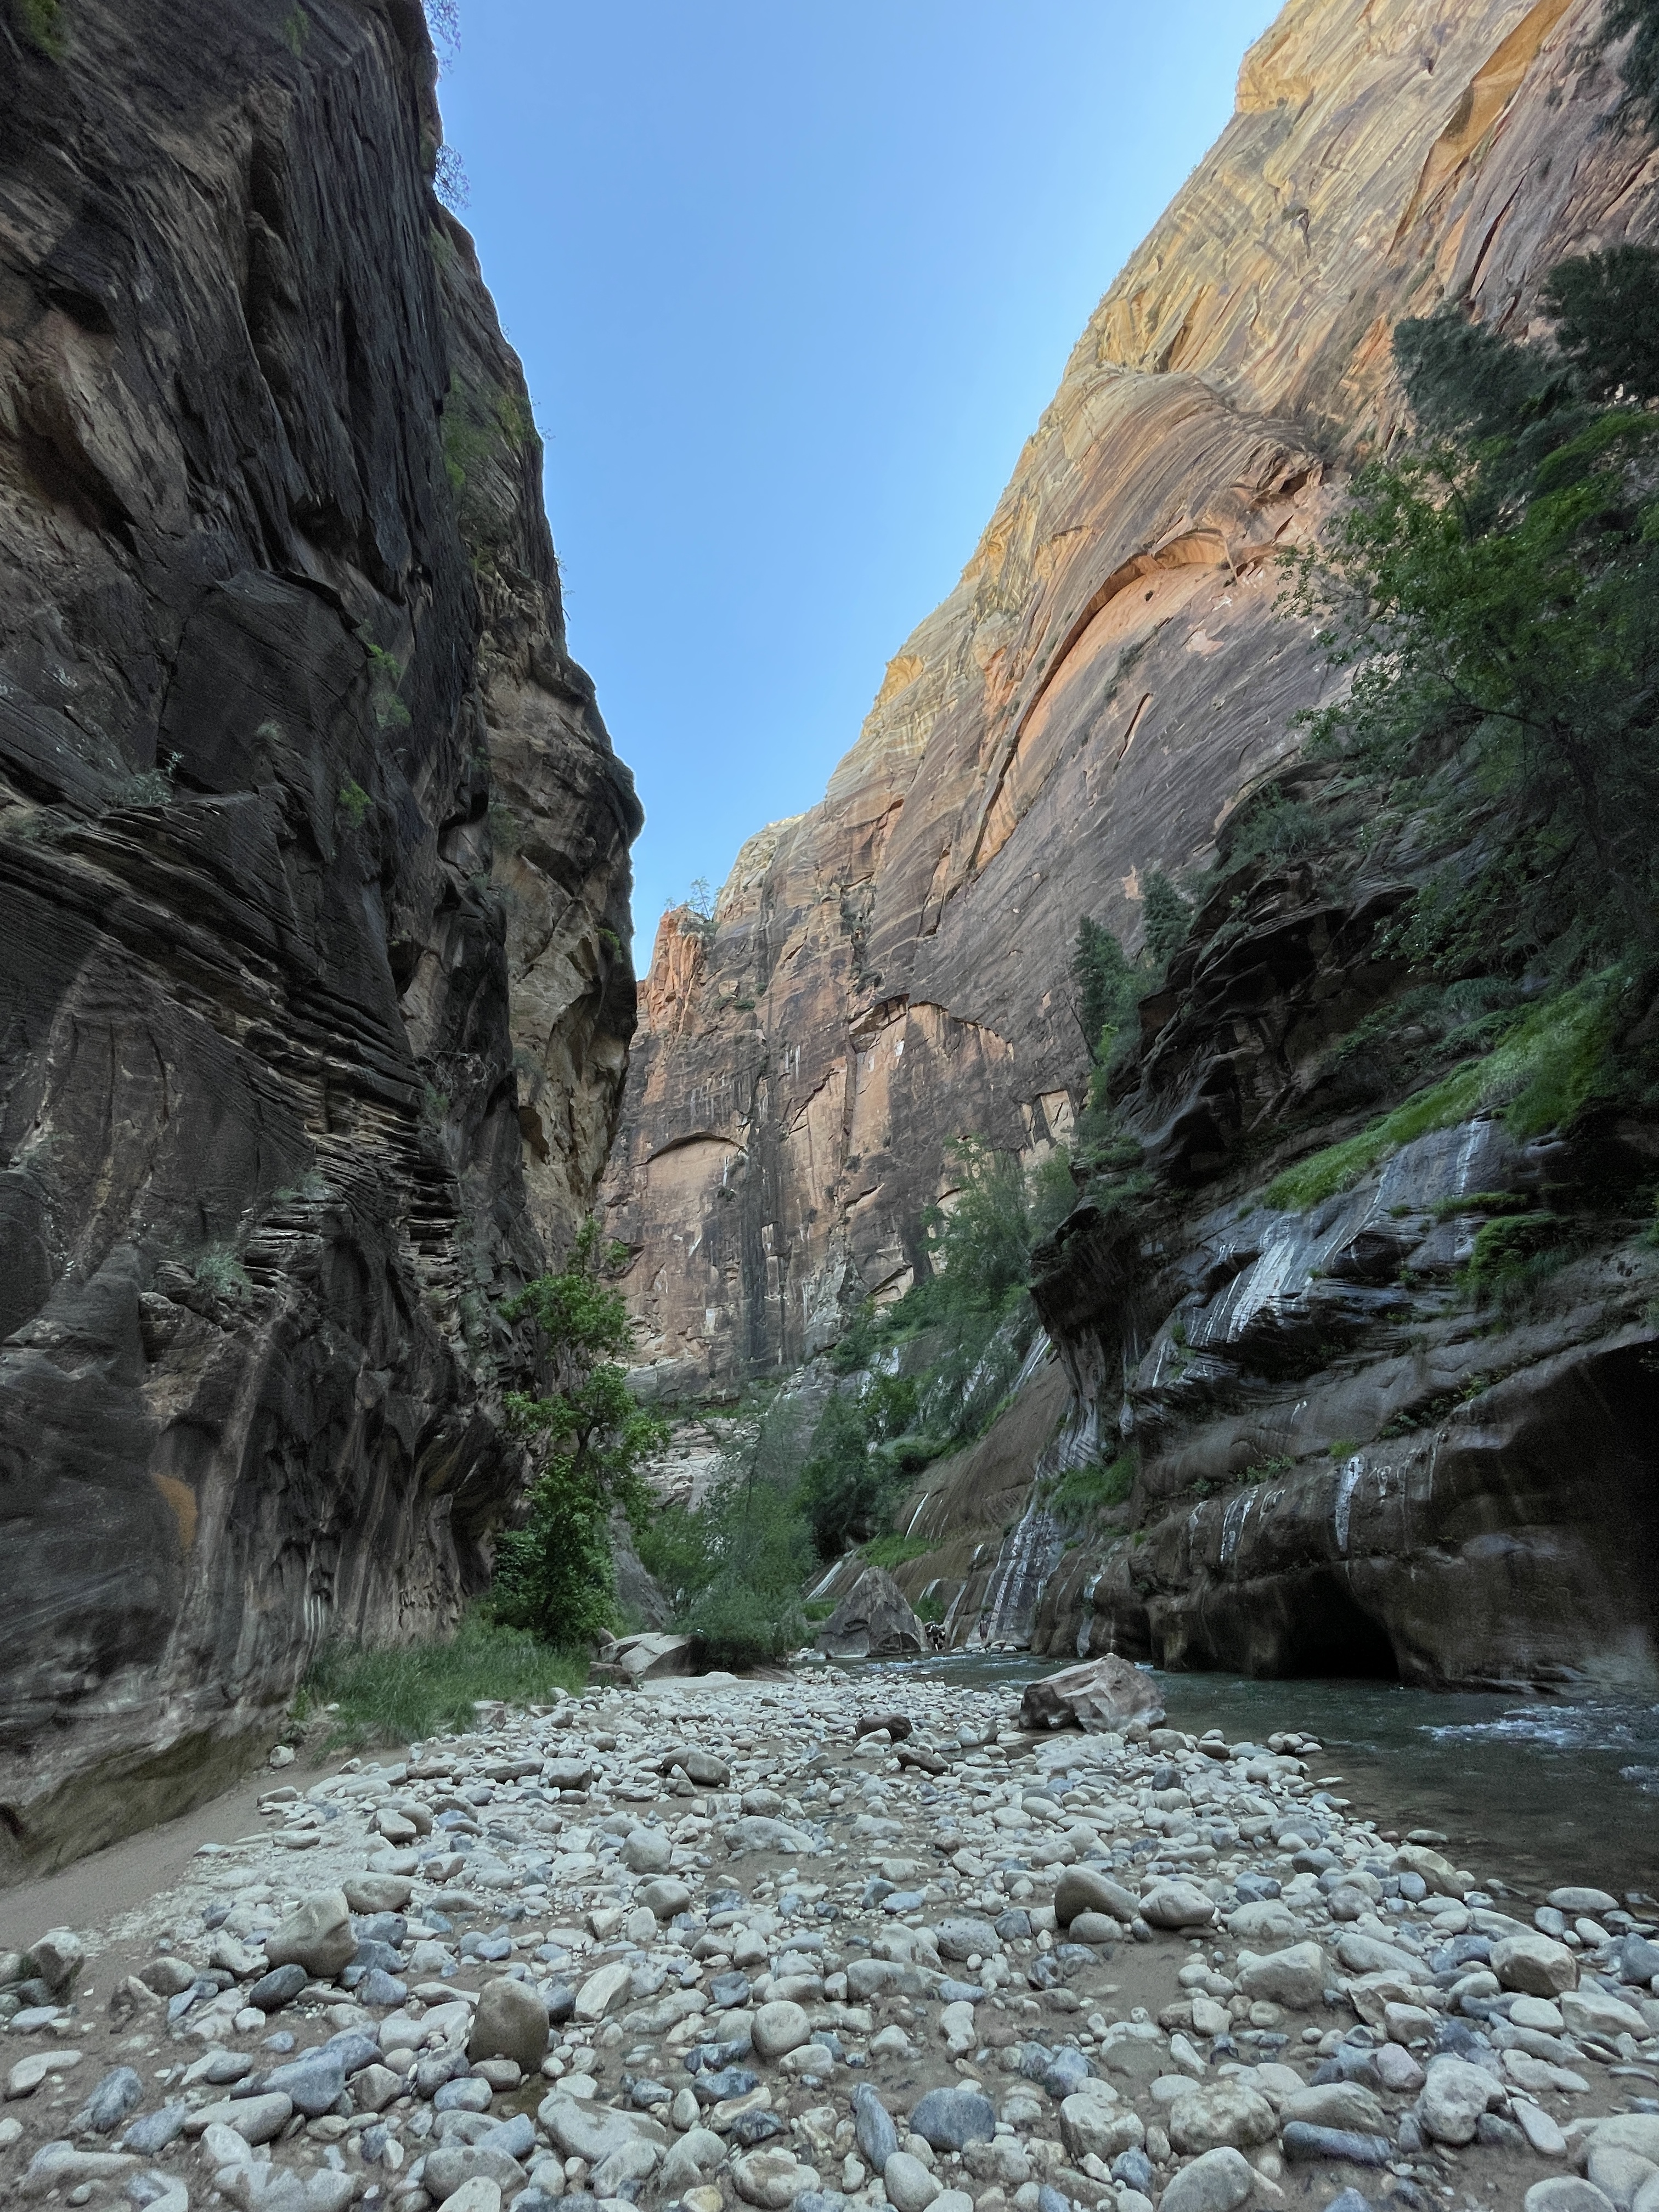
3. The Narrows (Bottom-Up Hike)
Distance: Flexible (we did ~5 miles in and out)
Trailhead: Temple of Sinawava Shuttle Stop
One of Zion’s most iconic hikes, The Narrows is a river walk through a towering slot canyon — and absolutely worth the hype. You don’t need a permit for the bottom-up route, and you can make it as long or short as you like.
We rented a dry pack, boots and walking sticks — and we’re so glad we did. The stick saved us from slipping multiple times, and water depth reached chest-high (I’m 6’1″) in spots. Expect to get wet, but also expect to be amazed.

📍 Logistics:
Start Early — Really Early
Zion’s no secret. Crowds form fast, especially in summer. We got to the shuttle by 6:30 AM in June and had no issues, but by early afternoon, the line was insanely long. Arriving early gives you flexibility and lets you hit trails before the heat and crowds.
Understand the Shuttle System
Zion’s shuttle is efficient and essential. Study the map ahead of time, especially if you’re planning longer hikes. Know where you’re getting on and off, and keep an eye on return times. If you want to avoid the shuttle altogether, your best option is to rent E-bikes.
Consider Renting E-Bikes
Something we wish we had done! Renting e-bikes gives you the freedom to skip the shuttle system entirely and explore at your own pace. Multiple outfitters in Springdale offer rentals. Next time, we’re biking in.
Gear Rentals for The Narrows
Essential unless it’s peak summer.
We rented from Zion Outfitter, but Zion Adventure Company is another solid option. Get dry gear, water shoes, and a walking stick. Trust us — it makes a big difference.
🍽️ Dining:
After a long day on the trails, Springdale — Zion’s gateway town — offers excellent places to relax and refuel. Here are three top picks:
1. Canyon Coffee
Canyon Coffee served as a great place for our afternoon pick me up in Zion after a day of traveling in from Vegas. The outdoor patio offers amazing views of the canyon and the coffee and pastries hit the spot.
2. Oscar’s Cafe
A Zion classic. Known for hearty portions, Oscar’s serves everything from burgers to fajitas to sweet potato enchiladas. Their outdoor patio is perfect for post-hike relaxation.
3. Zion Pizza & Noodle Co.
If you’re looking for a chill dinner spot to grab some pizza and beer, Zion Pizza & Noodle Co. is the way to go.
✅ Final Tips for a Perfect Zion Experience
Don’t overbook — give yourself time to wander, relax, and soak up the beauty.
Reserve accommodations and rentals early, especially in spring and fall.
Bring sunscreen, refillable water bottles, and layers — temperatures fluctuate a lot.
Always check weather and flash flood warnings before slot canyon hikes like The Narrows.
FAQ
- Do I need to rent gear for The Narrows?
- I would highly recommend having some sort of waterproof bag where you can keep your phone & other personal belongings.
- The waterproof shoes and neoprene socks were definitely helpful, but there were a handful of people doing the hike just fine without them.
- I would also highly recommend the walking stick as it saved us from falling multiple times
- How do I rent gear for The Narrows?
- We had a very easy time renting gear at Zion Outfitter. There’s a counter you walk up to where you can try on shoe sizes and pick out backpacks. After renting you have 24 hours before you need to return your gear, so I’d recommend going the day before you plan to hike The Narrows to make sure you have all your gear in order.
- Do I need a permit for Angel’s Landing?
- Yes, you do need a permit to hike Angel’s Landing, but if you are not lucky enough to land one, Scout Lookout offers incredibly similar views without having the need for a permit.
- Is the Canyon Overlook Trail worth it?
- 100% worth it. We we’re exhausted after the West Rim trail we did early in the day, and we didn’t want to commit to another 3+ mile hike as we we’re running out of daylight. The Canyon Overlook takes 30 minutes each way and offers incredibly rewarding views given how short the hike is. This is a must-see especially if you are on a tight timetable at Zion National Park!
